It's always a good idea to stock up on some thank you cards and today I'm sharing 5 Ideas using a few new sets from our latest release. You can easily bundle these together and they would make the perfect little gift.

Create a little bundle of Thank You's to give as a gift. Use our Notecards for you Stamp and Die to package up your beautiful cards. It's such a fun way to give a gift.

Peony Dreams Stamp , Climbing leaves and our new So very much greetings are all made to compliment each other.
The climbing leaves set is beautiful on its own but it was actually made to accent your floral sets. It’s the perfect addition to bouquets and adds an amazing layer of leafy goodness.
The modern font and bold type of the new So Very Much Stamp Set is a perfect contrast to the soft floral designs and while it’s trendy and modern it’s quite timeless. We love greetings that we know will stand the test of time and this is one of them.


1.
This thank you card is layers of goodness. Starting with a simple stencil for the base we created some texture using our confetti dots stencil and white texture paste with added glitter to really make it shine.
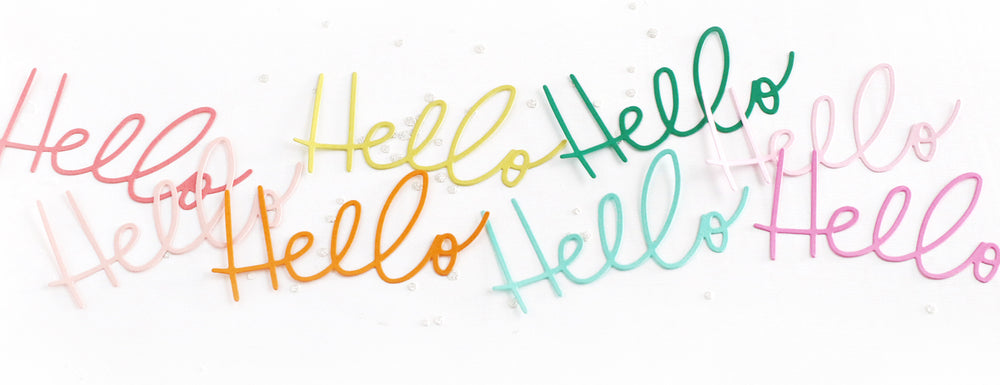
Next up we brought in our Pretty Poster lowercase dies to and layered each one using the coordinating color crush cardstocks. Adhering with foam tape to really create that dimension. Using the little accent flower from Peony dreams we stamped it in a variety of colors and scattered on the card for some added color and dimension. We finished it off with the so thankful for you greeting embossed in gold.

2.
For the base of the card I have used the Delicate Dots Foil plate with Gold foil. It’s subtle and simple but still allows the image to pop. Stamp a few different colors of the Climbing leaves stamp and die cut. Adhere with foam tape to give them added dimension. Emboss the aww thanks friend with silver on white cardstock and die cut. Layer over the leaves for the finished card.


3.
I’ve stamped and die cut a 4 different peony’s with some leaves. Layer and overlap to create a cluster on your card front. Add in some diecut leaves and top off with a simple thanks greeting. It’s such a fun colorful card and just because the flower images are large doesn’t mean you can’t add lots to your card fronts. Just get creative with layering and letting some come off the card. Trim as necessary and you a completely different look.

4.
Stamp a Peony and some leaves from your Peony Dreams stamps set and here’s where it gets good add an extra layer of leaves using the climbing leaves stamp. It’s organic flowing leaves are such a fun touch.
I accented the main image with a few little bitty blooms from the peony set and a classic thank you embossed in white on vellum added to the corner. With all the die cut pieces and layers this card is sure to make them pause and explore :)
5.
Using the large Thank you so very much greeting we embossing in white on vellum and added an extra layer of cardstock to each word. This really makes the words pop and give the white on white a little more depth. Accent with your favorite color for a peony and a couple little leaves and you have another perfect thank you card.

SUPPLIES
Thank for stopping by and I hope you enjoyed seeing some different ways to use these products together. I’ll be linking a You Tube video later so you can see me make a couple of these cards.
Hugs and Happy Stamping!
Amy


The idea of layering different colours beneath the words is just brilliant, and I’m going to try it out! Thanks from the U. K. 💐
These are just spectacular! I can’t wait for the Peony stamp to be restocked!
Beautiful cards giving me some good ideas. Thanks
Wow all of these cards are so pretty. Can’t wait for the YouTube video!!
Leave a comment